Images tab is a user catalog, in which you can store the selected image files, so they will always be at your hand. You can add or delete some images from the catalog, mount and unmount them while on this tab. Images catalog is a part of Basic functionality, and is available for every user. The tab consists of the list of images and Quick Mount area:
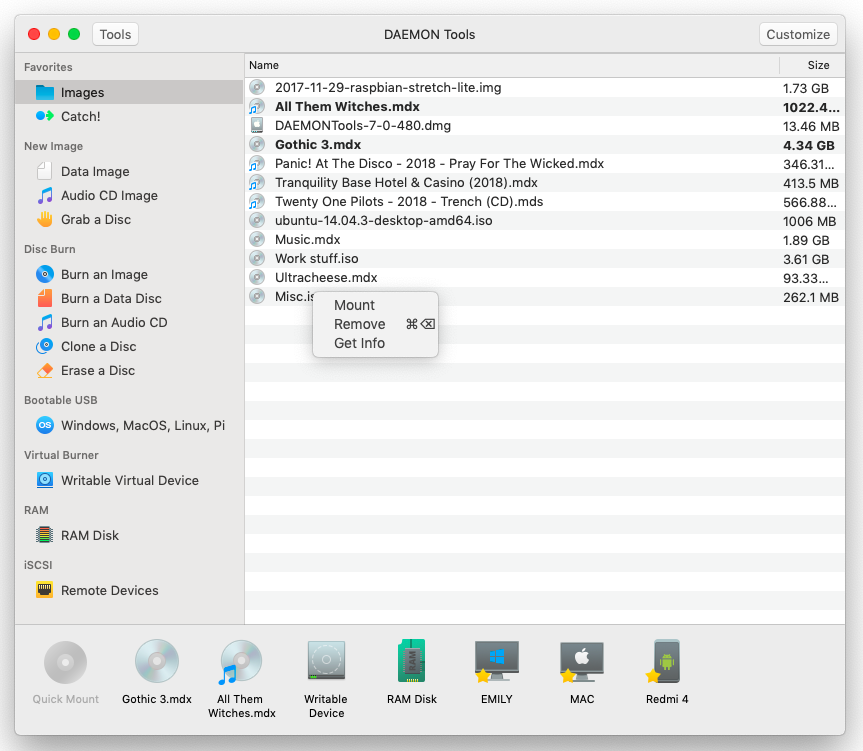
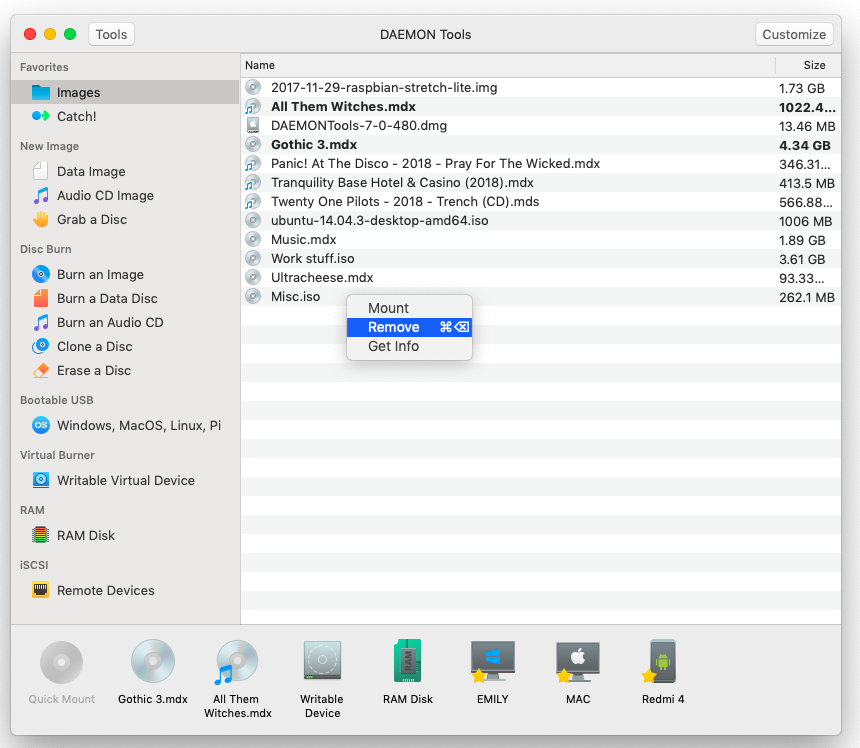
The list of images is a table, which has two columns: the name of the image and the size of the image file. Each image in the table has the contextual menu that consists of the following items:
-
Mount option makes the virtual image available for use.
-
Show in Finder option open the file location on disc.
-
Remove option deletes the image from the Images tab.
-
Get Info option shows the compact window with the most important information about the image file.
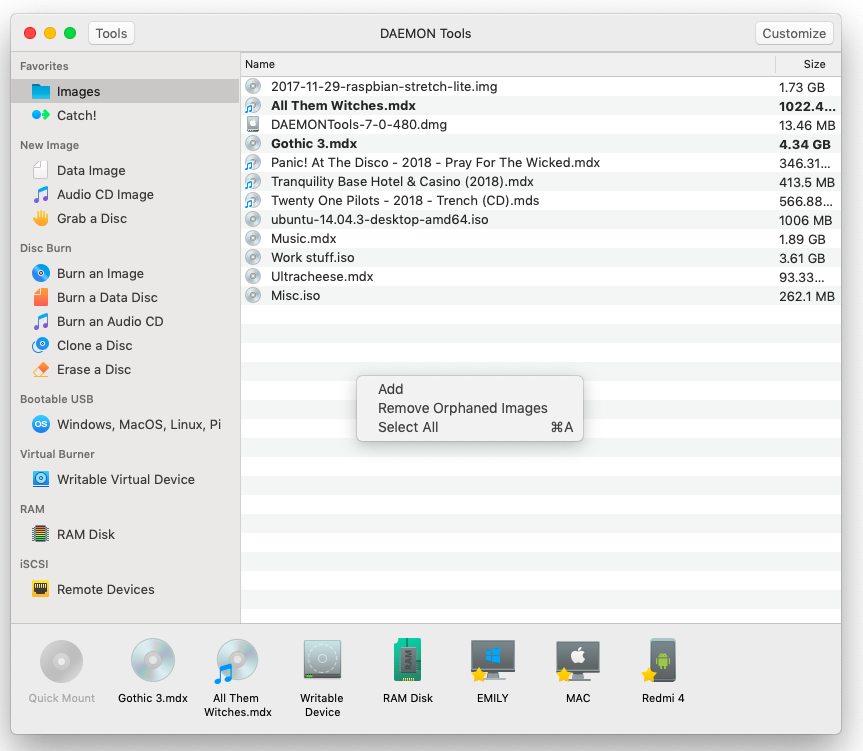
Images tab also has the contextual menu, which includes the following items:
-
Add option appends a new image to the Images tab.
-
Remove Orphaned Images option checks the availability of all items in the list and deletes the ones that are inaccessible — removed, renamed, deleted ones, etc.
-
Select All option allows you to choose all images from the tab at once.
Also, you can grade images by their name or file size. To sort a list, click on the title of each above mentioned column.
Adding image to the Images tab
Adding new images to the Images tab, you make their later usage easier. To add an image, you can:
-
Go to the contextual menu of the Images tab, choose Add option and then find the image you need on your computer.
-
Drag an image and drop it on Images tab. Also, you can drag'n'drop a folder with files. In this case, all image files from the folder will be added to the tab.
Removing images from the Images tab
To delete image from the Images tab, select it and then click Remove option from the contextual menu of this image. Also you can choose more than one image and delete them all at once.